Monday, January 16, 2012

Valentine Wreath

"But it's only January!" You say. Yes, I know that St. Valentine's Day is not for another month, but this is a special holiday for me... you see... it's my birthday.

Yep, I was one of the lucky ones born on Valentine's Day. As a result, I get quite giddy at the sight of red, pink and purple decorations in the store front windows, the overpriced Valentine cards, those disgusting yet addictive conversation hearts and of course, flowers, lots and lots of flowers.

Oddly enough, I have very few Valentine decorations in my house. I'll count them now... one, two.... that's it: two decorations. Not good. Totally insufficient for a Valentine-baby born in Loveland, Ohio (that will be my fun fact if I'm ever on Jeopardy).


I saw this pattern for a holiday wreath online days before Christmas and fell in love with it. The Cable Vision Wreath, designed by Hilary Hunt, uses only 2 skeins of Lion Brand Thick & Quick yarn, one wire wreath (easy enough to find at any craft store) and a ribbon. Not bad for some fast decorating. I really like Hilary's green Christmas version, but what I needed was a Valentine one.

I dug through my stash and found 2 skeins of LB's Thick & Quick in the Cranberry colorway. Perfect! What a fun, fast and festive solution to my decorating needs? Thick & Quick is a super bulky weight yarn made of 80% acrylic and 20% wool. It knits up super fast at a gauge of 2-3 stitches to the inch on size 13 (US) needles. It is machine washable, soft, and can take a beating from toddlers (am speaking/writing from experience here). Over the years, I have become quite a fan of this yarn, which has helped me get over my anti-acrylic attitude... or at least lessened it a bit.


It took me only one afternoon of movie-watching/knitting to finish my wreath. The pattern suggests to knit 12 repeats of the cable pattern, but I repeated it only 11 times (was afraid I'd run out of yarn) and it worked out just fine.

I added a wide, pale pink and gauzy ribbon from the craft store to finish the look and hung it on my dining area wall.
Now you all know that I do not possess the gift of great (or even good) photography skills. The picture to the right is without flash on my dinky camera...
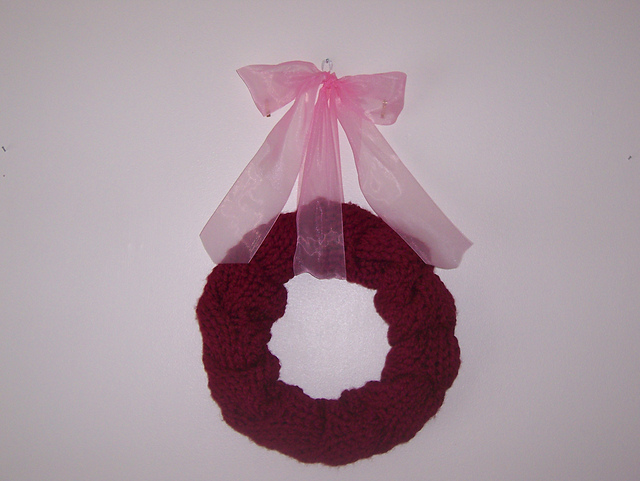


And the picture to the left is with flash on my dinky camera.


Oh well, at least I'm up to THREE Valentine decorations now!

Sunday, January 15, 2012

Warm Winter Mitts

This week we received our first decent snowfall in Northeast Ohio (and by decent, I mean 4 inches). Not much, but I'll take it. The weather has been unseasonably mild here, which is great if you don't like shoveling heavy snow or falling on slippery ice, but it's also not conducive to great knitting... at least not for me. There is nothing that makes me want to dig through my stash for a new project than frosted windows and the smell of snow.

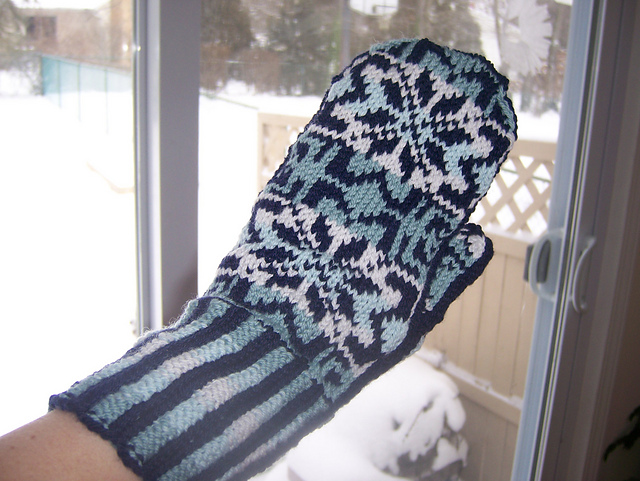
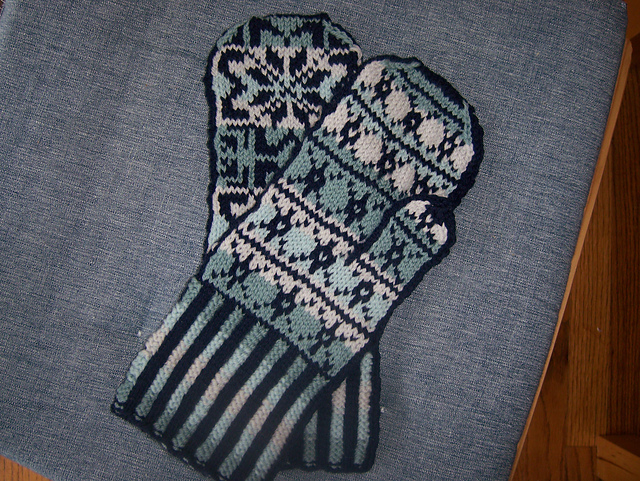
 So when the flakes began to fall, I cast on for a project I've had in my Ravelry queue since I first joined more than 3 years ago, the White Witch Mitts. What could be a better snow day project than a pair of fair isle mittens with a snowflake motif?


The pattern recommends using Blue Sky Alpaca Sport Weight Yarn, a soft-to-the-touch yarn made of 100% baby alpaca. I chose not to go the alpaca or alpaca blend route because these mittens were intended to replace a favorite pair of knitted mittens I made 2 years ago, Sheepy Mittens, which I made with alpaca sport weight yarn.


I do realize how odd that must sound for me to have knit fair isle mittens with a repeated sheep motif out of alpaca yarn instead of wool. No regrets though. I used beautiful yarn from a friend's alpaca farm (Black Diamond Alpacas) along with some Frog Tree Alpaca Sport and they turned out just as I had hoped. Two years later, they are starting to show some wear and so I needed a second pair to help ease the load of my winter-mitten-wearing.


I chose to knit my new pair of mittens with yarn from one of my all-time favorite yarn companies, Quince & Co. Chickadee is a sport weight yarn made of 100% American wool. I've knit with Quince & Co.'s worsted weight (Lark) and bulky weight (Puffin) and adored the experience. So it was only a matter of time that I'd get around to knitting with their springy sport weight.


I am not sure which part of knitting with this yarn I like more: the smoothly plied, soft wool or the gentle array of colors available.


These were made with Frost, Glacier, Bird's Egg and Pea Coat. They are warm, soft and fit beautifully. And the best part? I have tons of yarn left over!

Monday, January 9, 2012

Bandana Cowl

We are at the start of a new year, which means it is time for my local knitting group's anniversary party. I am lucky to have a wonderful group of women to knit with on a weekly basis. The group I am referring to is the Akron Stitch 'n Bitch knitting group.  We meet every Wednesday in the delightful Craft Akron studio, a place where you can take classes on just about any craft - such a great location for a knitters! The women in this group are down right hilarious. Every week I come home to my husband sharing funny stories of our conversations. I could seriously go on and on about them, but instead I'll get back on subject here.

Every January, the Akron Stitch 'n Bitch knitting group hosts an anniversary party. Members each bring a treat to share and a scarf to swap with another member. Last year (my first year participating), I made this scarf for the swap.


I found the pattern on Martha Stewart's website, entitled Knitted Neck Scarf, and made it out of one of my favorite yarns, Three Irish Girl's Galenas Merino.

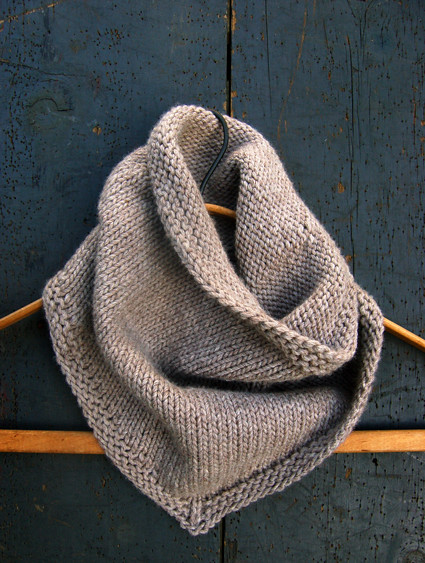
I don't know about other knitters and crafters, but I only like to give away items I'm proud of. That is, they must be made of lovely yarn and must look great. So keeping that it mind, I chose to make an item I've been coveting since the pattern was released on the Purl Bee blog: the infamous Bandana Cowl.

I'm a bit tired of scarves, or rather, I'm obsessed with cowls instead. I still love scarves, especially beautifully handknit ones, but with a toddler, an overflowing diaper bag and an enormous preggo belly to cart around, I'm just not all that eager to have extra fabric flopping in the way of getting from point A to point B.

I started making the Bandana Cowl in Plymouth's Baby Alpaca Grande (in white), but frogged the project when I realized I wouldn't have enough yarn to complete it (and truthfully, I did not feel like reworking the pattern to fit the yarn). So I dug through my stash and chose to knit with Cascade's Eco Duo, a luscious aran weight yarn made of 70% alpaca and 30% merino wool. This yarn is truly heavenly to the touch. It's one of those yarns that the moment you pick it up at your LYS you say something along the lines of, "ohhhhh" or "ahhhh" and most likely, "I'll take it!" It's just that good.

And the best part? It knits up beautifully!


My Bandana Cowl was knit using 24 in circular needles (the pattern suggested 16 in circs but I didn't have any in the size I needed) and I was able to bind off loosely so I didn't bother using a larger needle size as recommended for the last step.


I sure hope whoever takes this baby home loves it as much as I do!

Saturday, January 7, 2012

Content

With 9 weeks left in this pregnancy, I really ought to be knitting sweet baby items, but alas, I keep getting drawn into selfish knitting. I'm not sure what has come over me, but I cannot stop!

Last week, I finished a cardigan for myself. Hannah Fettig's Contented Cardigan is a pattern that I have been staring at since she first released it in the Spring. It is a casual open cardigan with a little cabled detail on the back.  Knit in worsted weight yarn, this cardigan should fly off anyone's needles. I chose a yarn, Plymouth's Galway Worsted, that is not the kind of yarn to fly off needles. Instead, I found myself pushing it off my needles. What I mean to say is that although this is a terrific yarn, very rustic, warm and sturdy, it is not soft to work with and therefore slows a knitter down a bit.

Don't get me wrong! I'm quite happy with the end result. My Contended Cardigan is cozy, warm, and the kind of sweater you reach for every chilly morning. It just took a little longer to knit than I expected. That's okay. All's well that ends well.

If you do chose to knit with this yarn, which I totally recommend (it would be great for some hearty winter mittens or a classic aran sweater), just remember that the yarn will soften with blocking (like most yarns do). I was quite concerned when I finished knitting this sweater at the level of stiffness and feared that it would not drape as I hoped post-blocking. Happily, it transformed into a very wearable garment. 


Now I have to warn you, I am not usually this big, but again, I am 31 weeks pregnant, so bare that in mind when judging the picture.


It is only natural for a crafter or artist to judge and reflect upon his/her work as it develops and once it is complete. So with that in mind, I wish the sleeves were slimmer - they are a bit wide for my taste. I probably could have gone down a size ( I made the 40/L size) but I just couldn't bring myself to make a size 36. And although I really love this color yarn (color # 751 a deep charcoal gray- one of my favorite colors!), it masks the cable detail on the back.


See what I mean?


It will be interesting to see how this garment lays on me post-pregnancy.

Tuesday, December 27, 2011

Baby boy accessories

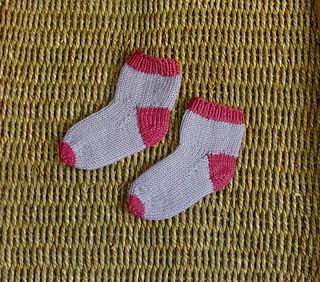
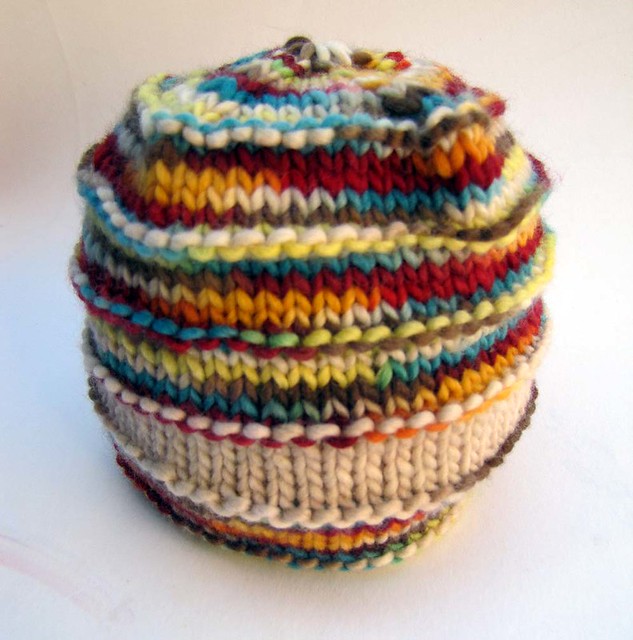
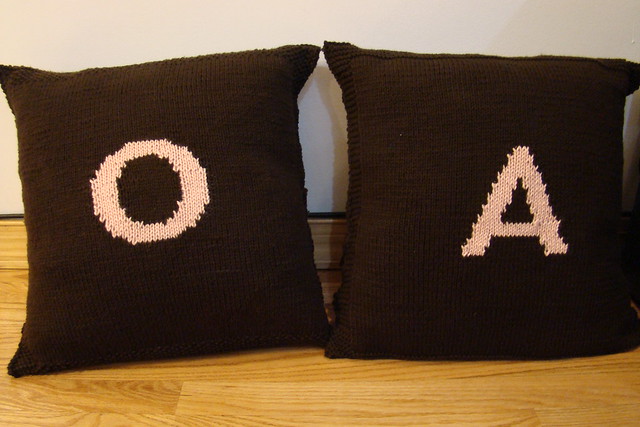
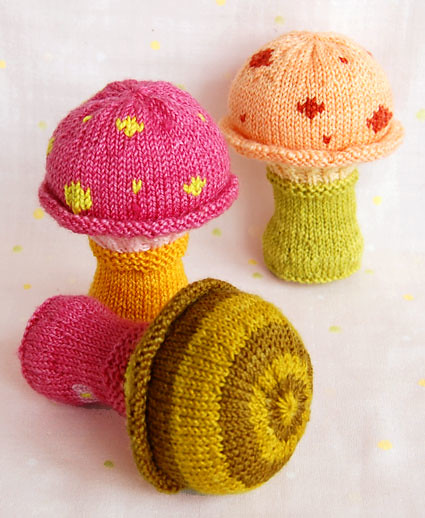
As promised, although I am posting this much later than I originally intended, here is my queue of sweet baby accessories (hats, socks, booties, toys) that I'd love to make for little one due this March.


And there you have it: twelve adorably kiddie patterns. But which to do first?

Thursday, December 15, 2011

Holiday organization

Don't you just love when two of your favorite things are molded into one? For me, blending holiday decorating and nerdy organization is like a little taste of heaven.


I came across the Christmas card wreath on Martha Stewart's website this fall and knew instantly that I had to make it. I'm one of those lucky people who is blessed by receiving tons of Christmas cards (not complaining- seriously, I love them, keep them coming!) but has zero place to put them.

This craft couldn't be easier. All you need are some clothes pins, an enormous embroidery hoop (which are super cheap, by the way), glue (the directions say to use wood glue, but I used a hot glue gun and it turned out fine) and a ribbon. That's all.

Here is what my wreath looked like on December 2.  I added a few non-holiday cards to help balance it out and create the effect of what it might look like later.


And here is what it looks like today, December 15.


Clearly, I should have purchased a bigger hoop!

Wednesday, December 14, 2011

Salt Dough Ornaments

Last year, my daughter and I started (what I hope will be) an annual-Christmas-ornament-making-day. She was only a year and a half at the time, so we made very simple (aka idiot-proof) felt ornaments from a Martha Stewart kit.

Now that Emma is older and much more into crafting, we made salt dough ornaments to give out to friends and family and, of course, add to our tree. I got the inspiration from another blog- a wonderful blog- called the Artful Parent, where the blogger shares nearly-daily crafts that she and her daughters enjoy. It seems like every time I read her blog, I say out loud, "Oh! I want to do that too!" Seriously, she is so clever. Check it out.

So the other day, she posted about making stamped salt dough ornaments.  Looked easy enough to me! Enter the mother-daughter ornament making for 2011:


The recipe is simple. Mix 4 cups of flour, 1 cup of salt and 1 and 1/2 cups of water together. Knead and roll the dough into a flat disc and chill. Then roll out the dough and cut your shapes using cookie cutters. Be sure to make a hole for the string! I've read several on several blogs that a straw works great for this task. However, I didn't have a straw, so I used the fat side of a chopstick and that worked just fine. Place the shapes on parchment paper on cookie sheets in a 225 degree oven for 3-4 hours. Once the shapes have cooled, start painting!


This recipe made 37 ornaments (about 2 dozen large and the rest small). Although I admit I had to toss a handful because the holes closed up on them, making it impossible to thread the yarn through. But  honestly, we didn't need this many ornaments so it was a great loss. I used Crayola washable paints (remember that my daughter is in the throes of toddler-hood = messy-hood), glitter and a sparkly yarn for decorating.


And after a morning of painting and glittering, this is what we ended up with!