Friday, July 27, 2012

How to Host a Successful Knit-Night

This week, I hosted the Akron Stitch 'n Bitch knitting group. Throughout most of the year, we meet regularly at a local craft studio (Craft Akron), but during the summer season, our schedule shifts a little, meeting every other week and at various locations (local parks, friends houses, wineries, etc).  I really wanted to make this night a little more special (more like a party and less like our weekly meet-ups) and tossed around many ideas before settling on a menu of snacks, drinks, and a special game with prizes.

I made sure to have a range of treats from healthy to super evil. The knitting-nerd in me came up with a very silly (but fun!) game too. I whipped up a list of 8 of my favorite yarns and gave my fellow knitters a chart to match each yarn with the correct corresponding yarn company (for example, Cascade - 220). To give them a little extra processing time, I also labeled each of the treats with the yarns and after everyone arrived, the game began. The first 3 people to correctly identify the companies with their yarns won a prize.

Oh! What did they win!?
Why, yarn, of course! I admit I did a little destashing on my friends. I gave away one (whole, unused) skein of Quince & Co.'s Chickadee, Berroco's Ultra Alpaca Fine and (a very very special skein because it's my friend's company) Black Diamond Alpaca's Chewbaca.

The game was a hit! But then, who doesn't like acquiring more yarn?

Alas, I was so busy having too much fun to take pictures during the party, but I did snap a few of the food.  Here is what I made:

"Cashsoft" Cashews

"Eco Duo" Extra Sharp Cheddar Cheese

"Springvale Merino" Spinach Dip (w/ veggies)
"Baby Cashmerino" Blueberry & Lemon Pound Cake - from Cooking Light
"Puffin" Puffed Pastry & Brie
"Kochoran" Kisses (Hershey)
"McClellan Fingering" M&M's
"Chickadee" Chocolate Cake - from America's Test Kitchen (it's actually called, "The Best Chocolate Cake Ever" and it couldn't be more true!)

Yes, those are supposed to look like knitting needles, but they came out a bit wonky.


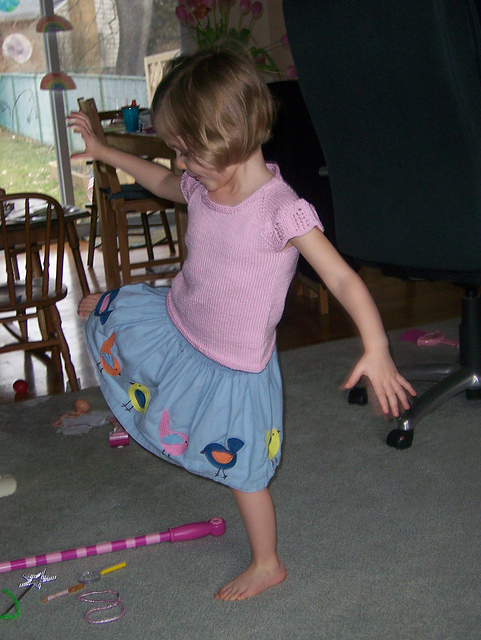
My daughter "testing" the dip.


So what are the secrets to hosting a fun and successful knitting party?

Provide the following:

1. Wine

2. Fun cheese

3. Chocolate

4. Yarn


That's it? Are you sure? Shouldn't I clean my house?
 No. A clean house? Why bother? All will be distracted by the food, wine and yarn.

Shouldn't I create a special Knit-Night playlist on iTunes?
Whatever for? Your friends will be making their own music with the clicking of their needles and laughter from all of the funny stories shared. In fact, I found myself sporadically turning down the music throughout the evening.

Do I need to organize a game?
Of course you don't need to, but man is it fun when you do! Go easy on yourself,  and just do a raffle prize or tape a piece of yarn under on of the seats to have only 1 winner. Oh how my brain is spinning with ideas for the next knit-night at my house!


Monday, July 23, 2012

Oval Table Cloth Tutorial

Recently, I read a post from the Craftiness Is Not Optional blog (an excellent blog, by the way) on how to make a fitted table cloth using oil cloth. Like Jess, the brain behind CINO, I, too, have young children and saw the benefits of using oilcloth (or laminated cotton) to cover a table where children frequently spill milk, juice, water, sand, paint, etc, etc, etc.


Jess' instructions were to make a fitted table cloth for an unattractive rectangular picnic table. My current kitchen table is a beautiful oval dining table recently acquired from my grandparents. I needed something to cover this table which could take a beating, wouldn't cost a fortune and would protect this antique. I loved the idea of a fitted table cover, but I'm a bit of a sewing novice, so I chose to make a very simple and short (only 5 inches of extra fabric on the edges) cover.


So, below you will find instructions on how I made my table cover for my 44 x 66 oval table. It is important that you know I have a thick table pad which rests on the table most of the time. I used this to trace onto my fabric as the template to base my measurements.

the table with table pad


Materials:
  • 2.5 yards of oilcloth or laminated cotton (at least 55 inches wide) I used Heather Bailey's "Lindy Leaf in Blue"  laminated cotton from the Nicely Jane Collection.
  • 9 yards of single biased tape
  • thread
  • pins
  • scissors
  • ruler or measuring tape
  • pencil


Directions:
  1. Place your fabric on the ground with the WRONG side facing up. 
 

2. Place the table pad on top of the fabric and center it.
3. Trace the shape using your pencil. Remove the pad. 

  
4. Using a ruler, measure 5 inches from the traced line and make 2-inch-long lines around the traced shape. This is the distance between the edge of the table and the hem. 
5. Using sharp scissors, cut along the dotted lines. You can connect these lines before cutting if it is easier for you. 


6. Attach the bias tape by sandwiching the edge of the fabric between the tape folds and pin in place. 7.Using a 3/8 in seam allowance, sew the tape and the fabric.
  
Voila! You now have a cute table cloth! 


Thursday, July 19, 2012

Halfway There!

6 down...


... 6 to go.


I've taken a sweater-knitting break to make a handful of gifts for friends this month. I'll post all about it once the last one is finished, which should be sometime in the next week or two.

So the question remaining is, what should I do next?

Here's what I'm trying to decide between now...
Bias Lace Shell

Cabled Plait and Bobble Sweater
Raglan Cardigan for Tommy with Peter Rabbit buttons


Audrey's First Day (of school) for Emma


Note that I have yarn in very similar colors for all of these projects.

Thoughts?


Monday, July 9, 2012

Hootie Booties

Whipped up some cloth shoes for my 4 month old son yesterday. I followed this pattern except I completely forgot to use the fusible interfacing recommended. I have so much of this fabric (Michael Miller's Hedgehog Who's Hoot Cream and coordinating Multi Stripe) that I could make many many more... and you know what? I think I will! Seems like everyone is having a baby this year, so I'm thinking these could be a cute baby gift (next time I will do what I'm supposed to do and insert that interfacing first).


Just like a baby...


Tommy...


would not..


stay....


still!


My happy boy:)


Saturday, July 7, 2012

Tutu


My little girl is currently taking her first ballet lessons this month. To celebrate her developing dancing skills and feed into her love of all things related to Angelina Ballerina, I made her a tutu.

The pattern is from Oliver +S: Little Things to Sew by Liesl Gibson.  This book is so sweet, full of darling little sewing projects for children, such as a Little Red Riding Hood cape, penguin backpack and dress for an American Girl doll (among many other projects).

My local library happens to carry a copy, thus giving me the opportunity to page through it and make this project for Emma.


There are dozens of tutorials for making tutus available online (and believe me, I looked at most of them). What I like about this pattern is how sturdy and durable the final product is due to the rows of basting the tulle and the double layer of ribbon.


Emma's tutu is layered with 2 shades of pink, 1 white and 2 shades of yellow tulle with 1.5 in wide yellow satin ribbon. Although I had a tricky time keeping the gathered tulle and ribbon layers lined up nicely, the tutu still turned out okay. My zig-zag stitch wasn't working correctly so the only alteration I made in the execution was to use an edge stitch when the directions suggested using the zig-zag.

The whole project took less than 1 hour (with multiple infant/toddler interruptions).

Thursday, July 5, 2012

Fabric Shopping Excursion

Wishing you all a belated happy 4th of July! I hope you had the good fortune to spend the holiday celebrating with friends and family.

I spent the morning with a friend shopping in fabric stores in Ohio Amish country. First we drove to Millersburg to check out Miller's Dry Goods & Quilts Shop, which is only an hour away. Very do-able. Although, isn't it sad that we had to go so far for a decent fabric store? I was really along for the ride, as I had no specific sewing projects in mind. We hit the jackpot at this first stop.They had a huge stock with a good supply of some of my favorite brands: Amy Butler, Michael Miller and various Moda designers too.

I picked up these fabrics to make the pattern (The Swing Bag) in the picture. I think I'm going to use the green for the lining, blue for the exterior and navy stripe for the bow.


They also had a terrific button stock. I found Peter Rabbit buttons for a little cardigan I plan to make for Tommy.

I had seen this project on Ravelry and looked high and low for those buttons, but came up empty. So you can imagine how excited I was to find them.


I plan to use my Plymouth Merino Superwash DK for the cardigan.


We did stop in Berlin, Ohio to go to the Helping Hands Quilt Shop, but I was less successful there (although I did see some 1930s reproduction prints and a few Henry Glass fabrics that were tempting).

Now the only question is... when will I get around to making these goodies?

Wednesday, July 4, 2012

Sweater #6: Miriam Cardigan

Sweater #6 is the Miriam Cardigan by Carrie Bostick Hodge.


What a wonderful pattern! I love how she writes her patterns, very clear and simple. The style is just as simple with clean lines and a flattering silhouette.  I was so worried that this sweater would not fit, because I tried it on just before picking up the stitches for the collar and it was very snug. I have yet to lose my remaining pregnancy weight, but thankfully this baby blocked like a dream. The finished product fits me perfectly!


Speaking of blocking...

No one is a perfect knitter, at least I hope not. We all make teeny tiny mistakes (and sometimes big ones too) that can be fixed with some aggressive blocking. Since I am far from perfect, I will share one of my many mistakes with you, but this one did not get fixed with blocking.  While finishing up the back part of this sweater, I noticed that I had accidentally increased early on. Since this was a simple stockinette stitch section, the increase stitch stood out like a sore thumb. So rather than ripping it back (the inch and a half of rows) I simply dropped the stitch and said to myself that I would be able to make that work with a little bit of wet blocking. I've done it before and usually it all works out fine in the end. Well as you can see, nothing changed. Luckily, this error is on the back. So at least I won't be reminded of it. 


The cardigan was knit with a favorite yarn of mine, Quince and Co.'s Chickadee yarn. Chickadee is a springy sport weight yarn made of 100% American wool. I love, love, love this yarn. And lucky me, I have an extra skein! I used exactly 7 skeins, even though the pattern called for 8. If you plan to make this, get the extra skein, because I was not exaggerating when I said "exactly." I think I may have had one yard left over. 


Don't you just love this soft pink? It's called Dogwood. It truly does remind me of the center shades of pink on Dogwood blossoms.


I started this sweater in the end of April, but then put it down to make Emma's 4th of July sweater. Sweater # 6 was actually completed on July 1. I tried so hard to finish it by the end of June, but ran out of steam. My husband was very sweet (knowing how disappointed I felt) and said that since his first work day of July was not until Monday (July 2), that meant that Sunday was still June to him and therefore if I finished it on that day, it still counted as June. Very sweet.

6 down, 6 to go.

Next up? I think this little one for my son. It's his turn.